Like all flooring types, it can experience issues over time. The emergence of hollow patches is among the most frequent worries. These spots can detract from the overall look and feel of your floor, potentially leading to more significant problems if not addressed promptly. In this article, we’ll explore how to identify hollow spots, understand their causes, and provide step-by-step instructions on fixing them effectively.
Table of Contents
ToggleWhat Are Hollow Spots in Engineered Wood Floors?
Hollow spots are areas beneath your engineered wood floor where there’s a lack of proper bonding between the flooring and the subfloor. This creates an air gap that can cause a hollow sound when stepped on or tapped. While not always a structural issue, hollow spots can affect the aesthetics and usability of the floor.
Causes of Hollow Spots
Understanding the root causes of hollow spots can help prevent them in the future. Here are some common reasons:
- Improper Adhesive Application: Uneven or insufficient adhesive during installation can leave voids under the flooring.
- Subfloor Irregularities: Uneven subfloors or debris can prevent the engineered wood planks from adhering properly.
- Moisture Issues: Excess moisture in the subfloor can weaken adhesive bonds or cause expansion and contraction of the wood.
- Installation Errors: Inadequate pressure during installation may fail to ensure full adhesive contact.
- Floating Floor Design: Hollow spots can form if the underlayment shifts or compresses in floating floor installations.

How to Identify Hollow Spots?
Identifying hollow spots is straightforward and doesn’t require specialized tools. Follow these steps:
a. Visual Inspection
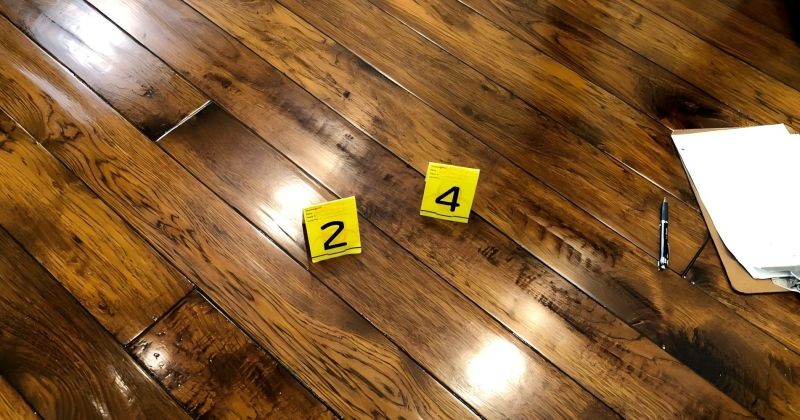
Look for slight depressions or raised areas on the floor’s surface. These may indicate voids beneath the planks.
b. Sound Test
- Walk across the floor, paying attention to areas that produce a hollow or echoing sound.
- Lightly tap the surface with a mallet or a closed fist to locate areas with a different acoustic profile.
c. Movement Check
Press down on suspect areas with your foot. Hollow spots may feel slightly spongy or move under pressure.
How to Fix Hollow Spots in Engineered Wood Floors?
There are various ways to address the hollow spots once you’ve located them. The type of flooring, the extent of the problem, and your degree of familiarity with do-it-yourself repairs will all influence the best course of action.
Method 1: Using an Injection Repair Kit
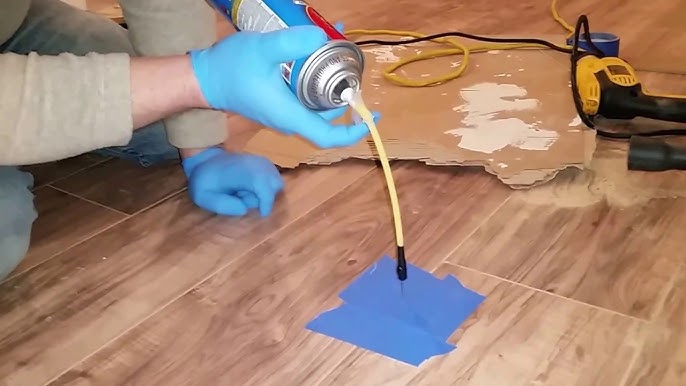
Injection repair kits are designed specifically to address hollow spots by filling voids with adhesive. Here’s how to use them:
Tools and Materials:
- Adhesive injection repair kit
- Drill with a fine drill bit
- Tape measure and masking tape
- Clean cloth
Steps:
1. Mark the Hollow Spots:
Use masking tape to outline the area where hollow sounds are detected.
2. Drill Small Holes:
Drill small holes (⅛ inch) into the hollow area, spacing them a few inches apart for even adhesive distribution.
3. Inject Adhesive:
Insert the adhesive nozzle into the drilled holes and slowly inject the adhesive until resistance is felt.
4. Distribute Adhesive:
Place a heavy object (like a weight or sandbag) over the repaired area to spread the adhesive evenly beneath the flooring.
5. Remove Extra Adhesive:
Use a fresh towel to remove any extra adhesive before it dries.
6. Give It Time to Cure:
Leave the weight on the repaired area for at least 24 hours to ensure the adhesive cures properly.
Method 2: Replacing the Affected Planks
For severe hollow spots or if the flooring has visible damage, replacing the affected planks may be the best solution.
Tools and Materials:
- Replacement planks
- Flooring adhesive
- Pry bar and mallet
- Circular saw
- Trowel
Steps:
1. Remove the Damaged Plank:
- Use a circular saw to carefully cut the plank into smaller sections, avoiding the subfloor.
- Pry up the pieces using a pry bar and mallet.
2. Prepare the Subfloor:
To get rid of debris and outdated adhesive, thoroughly clean the subfloor.
3. Install the New Plank:
- The subfloor should be covered with flooring adhesive using a trowel.
- Place the replacement plank in position, ensuring a snug fit.
4. Secure the Plank:
Apply pressure to the new plank using a weight to ensure a proper bond.
5. Clean and Finish:
Remove excess adhesive and allow the area to cure for 24 hours.
Method 3: Preventative Maintenance for Floating Floors
For floating floors with hollow spots caused by shifting underlayment, consider the following:
Add Shims or Fillers:
- Insert thin shims or padding under the floor to fill gaps.
Replace Underlayment:
- If the issue is widespread, replacing the underlayment with a more stable material may be necessary.
Tips for Preventing Hollow Spots
To avoid hollow spots in the future, follow these best practices:
Ensure Proper Subfloor Preparation:
- Level and clean the subfloor before installation.
Use Quality Adhesive:
- Invest in high-quality adhesive and apply it evenly.
Control Moisture:
- To stop water damage to concrete subfloors, apply a moisture barrier.
Hire Professionals:
- If unsure about the installation process, hire experienced flooring professionals.
When to Call a Professional
Although many hollow spot repairs can be completed on your own, there are some circumstances in which expert assistance is required:
- The affected area is extensive or spans multiple rooms.
- The flooring is part of a high-value installation, and precision is critical.
- You lack the tools or experience to carry out repairs confidently.
Although they can be annoying, hollow patches in engineered wood flooring are not intractable. By identifying the issue early and using the appropriate repair methods, you can restore your floor’s beauty and functionality. Whether you choose a simple adhesive injection or a more involved plank replacement, the key is prompt action to prevent further damage.
As a professional engineered wood flooring manufacturer, MAJOR can also provide valuable insights and solutions tailored to your flooring type. With proper maintenance and installation techniques, you can ensure your engineered wood floors remain flawless for years to come.

