

Many businesses and homeowners choose parquet flooring because of its durability and intricate design, which makes it a classic and elegant option. However, over time, spills, high foot traffic, and normal wear and tear can harm parquet tiles. The beauty of your floor can be restored by making replacement parquet tiles rather than replacing the entire floor.
In this guide, we will walk you through the process of making replacement parquet tiles yourself, from choosing materials to installation.
Understanding Parquet Flooring
The most popular designs are chevron, basketweave, and herringbone. Parquet can be made from various types of wood such as oak, maple, cherry, or walnut, which give it a natural and aesthetically pleasing look. Parquet tiles are usually small squares or rectangles, typically about 12 inches in length. When a tile becomes damaged, you don’t necessarily need to replace the entire floor; a replacement tile is all you need.
Assess the Damage and Remove the Damaged Tile
Before making replacement tiles, you must assess the damage to your existing parquet floor.To swap out a broken tile, do the following:
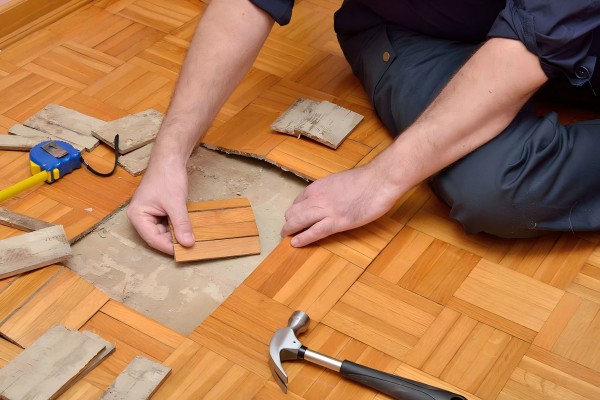
Step 1: Remove the damaged tile
- If the tile is glued down, use a utility knife to carefully score around the edges of the damaged tile. By doing this, you can prevent harm to the nearby tiles.
- The damaged tile can be carefully lifted with a flat pry bar. To prevent neighboring tiles from cracking, make sure to apply even pressure.
- If the tile is nailed down, remove the nails carefully with pliers.
Step 2: Clean the area
- Once the damaged tile is removed, thoroughly clean the area of any old adhesive, dirt, or debris. This ensures that the new tile will adhere properly.
Choosing the Right Materials
To make replacement parquet tiles, you’ll need to select the appropriate materials. The final appearance, longevity, and total cost of your replacement tiles will all be influenced by the material you select.
Wood type:
- The type of wood you use should match the existing floor for a seamless look. Hardwood like oak, maple, or walnut is commonly used for parquet tiles.
- Consider the grain pattern and color to ensure that your new tile blends well with the rest of the floor.
Tile size:
- Most parquet tiles are 12 inches square or rectangular, but the size may vary based on the design of your floor. If you’re making your own replacement tile, measure the size of the damaged tile to ensure you create one that fits.
Adhesive:
- You’ll need a strong adhesive to bond the new tile to the floor. An excellent wood or construction adhesive will do the trick.
- If you’re reusing the old subfloor, make sure the adhesive is compatible with the existing surface.
Cutting the Wood
Once you’ve gathered the necessary materials, it’s time to cut your new tile. To guarantee that the tile fits well and complements the style of your current floor, this stage demands accuracy.
Step 1: Measure and mark the wood
- Start by measuring the dimensions of the tile you’re replacing. Use a tape measure to get the exact width and length, and transfer these measurements to your new piece of wood. Mark the cutting lines clearly with a pencil.
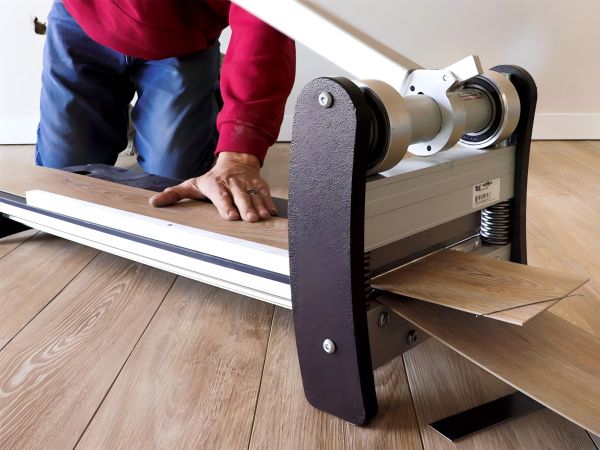
Step 2: Cut the wood
- Cut the wood to the proper size with a saw. A circular saw, jigsaw, or handsaw can all be used, depending on your preference and the type of wood you are cutting. Ensure that the cuts are accurate and straight.
- If your parquet pattern involves specific angles, like herringbone, you may need to cut the wood at specific angles to match the existing layout.
Step 3: Sand the edges
- After cutting, use a sandpaper block or an orbital sander to smooth any rough edges. In addition to preventing any sharp edges from inflicting harm or injury, this will assist guarantee that the new tile fits snuggly with the surrounding tiles.
Creating the Parquet Pattern
If your floor has a particular parquet pattern, you will need to replicate that pattern on your replacement tile. For instance, if your floor has a herringbone pattern, your new tile should also reflect that design.
Step 1: Plan the pattern
- Lay out the pieces of wood you plan to use for the replacement tile in the pattern of the existing floor. Use a template or guide to ensure uniformity.
Step 2: Cut and arrange the wood
- For example, in a herringbone pattern, you will cut the wood into narrow rectangular strips.
- Lay these strips on a flat surface, arranging them to match the pattern you want to replicate. Once satisfied with the design, glue the strips together to form one complete tile.
Step 3: Clamping
- Use clamps to hold the individual pieces in place while the glue dries. Ensure that every component is correctly aligned to create a neat and consistent design.
Staining and Finishing
Once the replacement parquet tile is glued and dried, it’s time to finish the wood. Think about whether your floor has a glossy, satin, or matte finish because the finish should be as near to the original floor as feasible.
Step 1: Sand the tile
- Once the glue has fully dried, lightly sand the surface of the tile to ensure that it is smooth. This helps remove any excess glue and prepares the wood for staining.
Step 2: Apply the stain
- Select a stain that complements the current color if the wood of the tile needs to be stained to match the floor. To achieve a consistent finish, use a brush or cloth to apply the stain evenly, following the grain of the wood.
Step 3: Apply a protective finish
- After the stain has dry, give the tile a protective coating.
- Use a polyurethane or varnish for a durable, long-lasting finish. It would be a good idea to apply two or three coats, making sure that each one dries completely before applying the next.
Installing the New Parquet Tile
Once the tile is dry and finished, it’s time to install it in place. Follow these steps to install your replacement parquet tile:
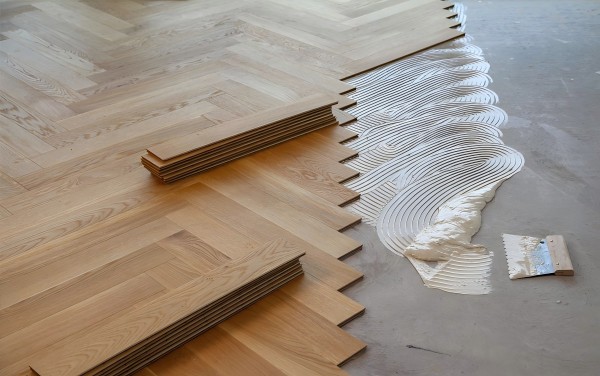
Step 1: Apply adhesive
- On the subfloor where the tile will be installed, apply a thin coating of wood adhesive. Be sure to cover the entire area evenly for a strong bond.
Step 2: Place the tile
- Carefully place the new parquet tile into the space, making sure it aligns with the surrounding tiles. Apply light pressure to guarantee a solid connection.
Step 3: Secure the tile
- Once the tile is positioned correctly, use weights or additional clamps to hold it in place while the adhesive dries. Give the adhesive the appropriate amount of time to cure, which is often 24 hours.
Step 4: Clean up excess adhesive
- If any adhesive seeps out from the edges of the tile, clean it off immediately with a damp cloth before it dries.
Finishing Touches
You might need to make a few last-minute changes after the tile is installed:
Step 1: Check alignment
- Make sure the new tile is level with the tiles around it. Tap the tile into place carefully with a mallet if needed.
Step 2: Refinish the floor
- After all tiles are installed, you can apply a final layer of floor finish to the entire floor. This will give the floor a uniform look and help shield it from further harm.
Tips for Success
- Matching the wood: Be sure to choose wood that matches the grain, color, and texture of the existing floor. If necessary, test a small piece before proceeding with the full tile.
- Precision: To guarantee that the new tile blends in perfectly with the floor, precise measurements and cuts are essential.
- Time and patience: Making and installing replacement parquet tiles can be a time-consuming process, but the results will be worth it.
Making replacement parquet tiles can be a rewarding DIY project that allows you to restore the beauty of your floor without the need for a full replacement. By following these steps—assessing the damage, choosing the right materials, cutting and arranging the tiles, finishing, and installation—you can create a custom solution that will blend seamlessly with your existing floor.