
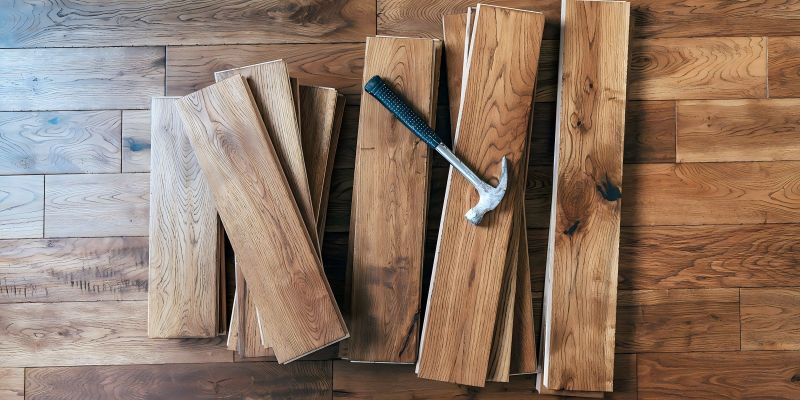
What’s Engineered Wood Flooring?
Engineered hardwood flooring is made from multiple layers of high-density fiberboard (HDF) or plywood with real wood veneered on. It looks like real wood but is more stable, resistant to temperature changes and moisture, and is economical and affordable.
Based on Structure
The Thickness of Engineered Hardwood Flooring
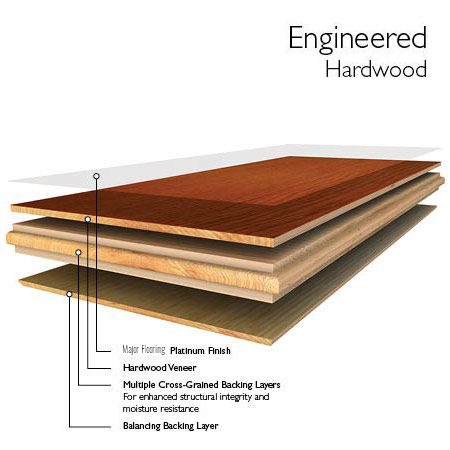
Veneer Layer (Top Layer):
- Real hardwood veneer, typically 2-6 mm thick.
- Provides an authentic wood appearance and can be sanded and refinished.
Core Layer (Middle Layer):
- High-density fiberboard (HDF), medium-density fiberboard (MDF), or plywood in multiple layers.
- Provides stability and strength while minimizing the expansion and contraction that come with natural wood.
Back Layer (Bottom Layer):
- Stabilizing layer, often made from the same wood species as the core or another durable material.
- Ensures balance and prevents warping or bowing of the floor.
| Major Flooring | Top Veneer | Core Layer | Back Layer |
| 2-layer | 3mm/4mm | 6mm/7mm | None |
| 3-layer | 3mm/4mm | 9mm | 2mm |
| Multi-layer | 1.2mm/2mm/3mm/4mm/6mm | 11mm/12mm/13mm/14mm | None |
The Width of Engineered Wood Flooring
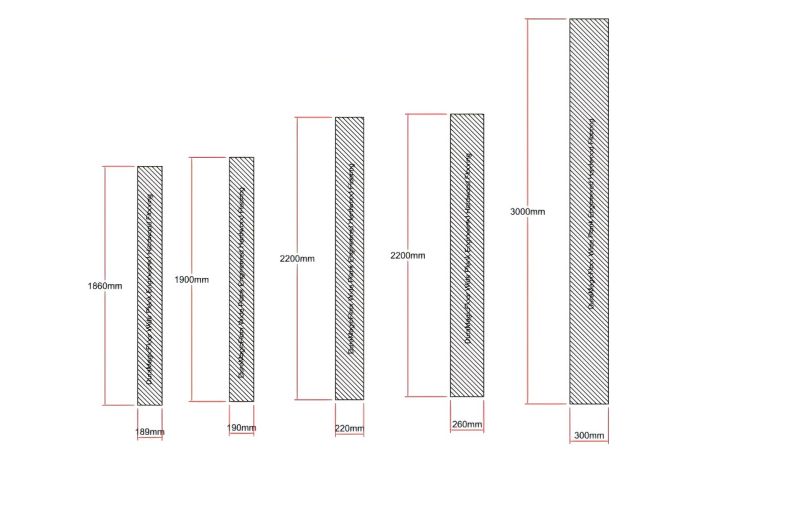
- Wide engineered wood flooring features planks that are typically 5 inches or wider, offering a modern, spacious look with fewer seams, ideal for large rooms and contemporary designs, highlighting the wood’s natural grain and texture.
- Narrow engineered wood flooring typically has planks that are 3 to 5 inches wide and offer a traditional, sophisticated look with more seams. Herringbone and chevron patterns come in a variety of narrow plank sizes and are ideal for smaller rooms or spaces that require a more complex, structured design.
| Feature | Wide Engineered Wood Flooring | Narrow Engineered Wood Flooring |
| Width | 5 inches (127 mm) or more | 3 to 5 inches (76 to 127 mm) |
| Aesthetic | Modern, open, luxurious | Traditional, detailed, classic |
| Best for Room Size | Larger rooms | Smaller rooms |
| Visual Effect | Expands space, fewer seams | Elongates room, more seams |
| Installation | More challenging in small spaces | Easier in tight spaces |
| Cost | Generally higher | Typically lower |
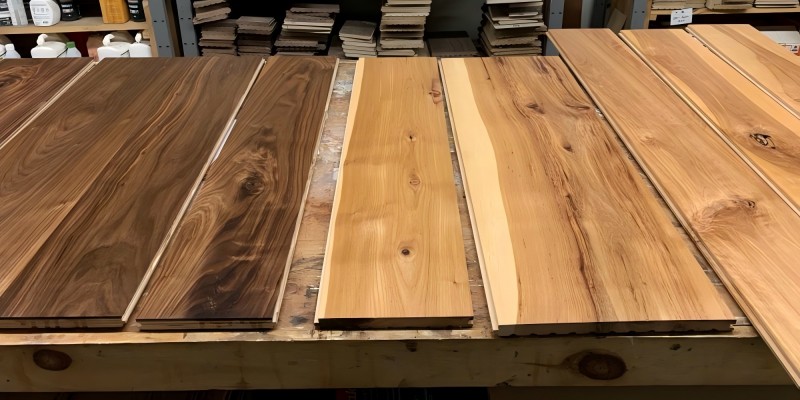
Based on Species
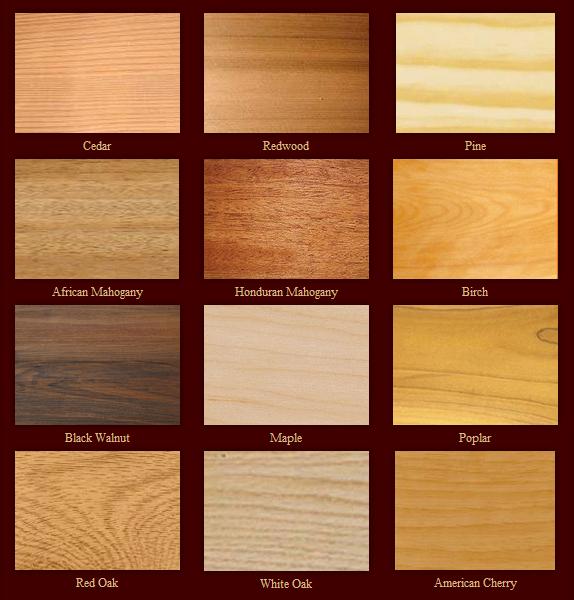
- Oak: It is a durable, popular choice with attractive grain patterns, and White Oak‘s higher hardness (1,360 Janka) makes it more resistant to dents than Red Oak (1,290 Janka).
- Maple: With a high hardness of 1,450 Janka, it is known for its light, creamy color and smooth grain, offering durability and resistance to dents, though it may show scratches more easily.
- Hickory: With a very high hardness of 1,820 Janka, it is one of the hardest domestic woods, featuring distinctive grain and color variation, and is extremely durable for high-traffic areas.
- Walnut: With a medium hardness of 1,010 Janka, it is softer than other hardwoods but is favored for its rich dark brown color and straight grain, making it popular for luxurious spaces despite being less resistant to dents.
- Cherry: With a medium-low hardness of 950 Janka, it is softer with a smooth texture and warm reddish-brown color that darkens with age, adding elegance to any room despite being more prone to dents.
- Birch: With a medium-high hardness of 1,260 Janka, it features a fine, straight grain with pale coloring, offering durability similar to oak, and is widely used in both traditional and modern settings.
- Bamboo: Hardness varying from 1,380 to 3,000 depending on processing, is extremely hard, durable, eco-friendly, and offers a unique contemporary look, often surpassing traditional hardwoods in hardness.
- Teak: With a medium-high hardness of 1,070 Janka, it is prized for its natural oils that resist moisture and decay, featuring a warm golden-brown color, and is suitable for both indoor and outdoor use.
Based on Finish
- Matte Finish: A low-gloss finish with minimal shine offers a natural, understated appearance, hides scratches and imperfections, and is ideal for high-traffic areas, providing a modern or rustic look.
- Satin Finish: A mid-level sheen offers a soft glow, balancing matte and glossy finishes, providing a warm, inviting look with durability and versatility for both traditional and contemporary settings.
- Semi-Gloss Finish: With a noticeable sheen that reflects more light, this finish adds brightness and elegance, creating a polished, refined look with good durability, ideal for formal spaces.
- High-Gloss Finish: A very shiny, reflective finish creates a smooth, sleek look, offering a luxurious, glamorous appearance that highlights the wood grain, ideal for modern or high-end interiors.
- Brushed Finish: A textured finish achieved by brushing to highlight the natural grain adds a rustic, weathered look with enhanced durability, effectively masking wear and tear.
- Oiled Finish: A finish using penetrating oils, like hard wax oil, enhances the wood’s natural appearance, providing a warm, matte look that can be spot-repaired and nourishes the wood over time.
- UV-Cured Finish: A UV-cured finish, often used for water-based polyurethane, is extremely durable, resistant to scratches, chemicals, and UV rays, maintaining its appearance over time without yellowing.
- Distressed Finish: Using techniques like hand-scraping or wire brushing gives the wood an aged, worn look, adding character and a vintage feel while blending scratches and dents into the distressed appearance.
Engineered Wood Flooring Pros and Cons
Advantage:
- Suitable for installation over radiant heating systems, concrete, and basements.
- Offers a broad range of wood species, finishes, and textures with the appearance of genuine hardwood.
- Generally more affordable than solid hardwood while providing a similar appearance.
- Can be installed as a floating floor, glued down, or stapled, making it suitable for DIY projects.
- Uses less hardwood, often incorporating faster-growing wood species in the core layers, making it more eco-friendly.
Disadvantage:
- Depending on the thickness of the top veneer, only a restricted number of sandings and refinishes are possible.
- Although more stable than solid wood, it is not waterproof and can be damaged by excessive moisture.
- In some cases, the layers can separate over time, especially with poor-quality products.
- The cost of premium engineered wood flooring can match that of solid hardwood.
- This may not last as long as solid wood floors if not maintained properly, especially in high-traffic areas.
|
|
What’s The Type of Engineered Wood Flooring?
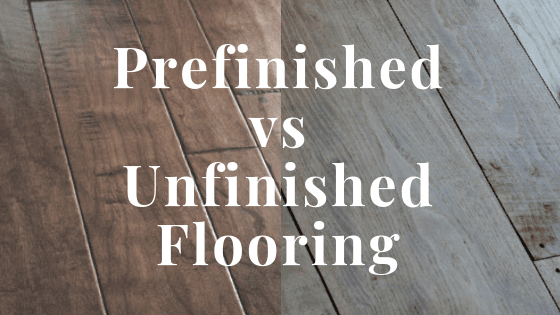
Based on Prefinished
Prefinished engineered wood flooring is a type of engineered wood flooring that comes with a factory-applied finish, meaning the wood has been sanded, stained, and sealed before it is installed. This finish is typically more durable and consistent because it is applied under controlled conditions in a factory, often using techniques like UV curing that are not possible with on-site finishing.
Here are some key features of prefinished engineered wood flooring:
- The flooring doesn’t require on-site sanding, staining, or sealing because the finish is applied in the factory, making it ready for use right away after installation.
- Factory-applied finishes are often more durable and longer-lasting compared to finishes applied on-site, offering better resistance to wear, scratches, and moisture.
- The finish is applied uniformly across all planks, ensuring a consistent look and quality throughout the flooring.
- No sanding dust or strong odors from stains and sealants are produced during installation.
Based on Unfinished
Hardwood veneer sits on several layers of other layers of wood to form unfinished engineered wood flooring. Unfinished engineered wood flooring is put in its raw state and then sanded, stained, and finished on-site, in contrast to prefinished engineered wood flooring, which has a finish applied at the factory.
Here are some key features of prefinished engineered wood flooring:
- Allows for on-site finishing, giving you the flexibility to choose your preferred stain, finish type, and sheen level.
- After installation, the flooring can be sanded and finished as a whole, providing a seamless, uniform appearance without pre-finished edges.
- Ideal for matching new flooring with existing wood floors, as it can be finished to blend perfectly with adjacent surfaces.
- After installation, the final finish is applied to guarantee that the floor is shielded from scuffs and damage while being installed.
- May use less chemical processing compared to pre-finished flooring, giving off fewer volatile organic compounds (VOCs) during installation.
| Feature | Prefinished Engineered Wood Flooring | Unfinished Engineered Wood Flooring |
| Finish Application | Factory-applied, ready to install | Applied on-site after installation |
| Installation Time | Faster, can be used immediately | Slower, requires sanding and finishing |
| Durability | Consistent, durable factory finish | Customizable, but depends on the quality of on-site application |
| Aesthetic Options | Limited to factory finishes | Fully customizable on-site |
| Cost | Typically higher initial cost | Potentially lower initial cost, but additional labor for finishing |
| Maintenance | Easy, often comes with a manufacturer’s warranty | Requires regular maintenance, especially in high-traffic areas |
What’s The Style of Engineered Wood Flooring?
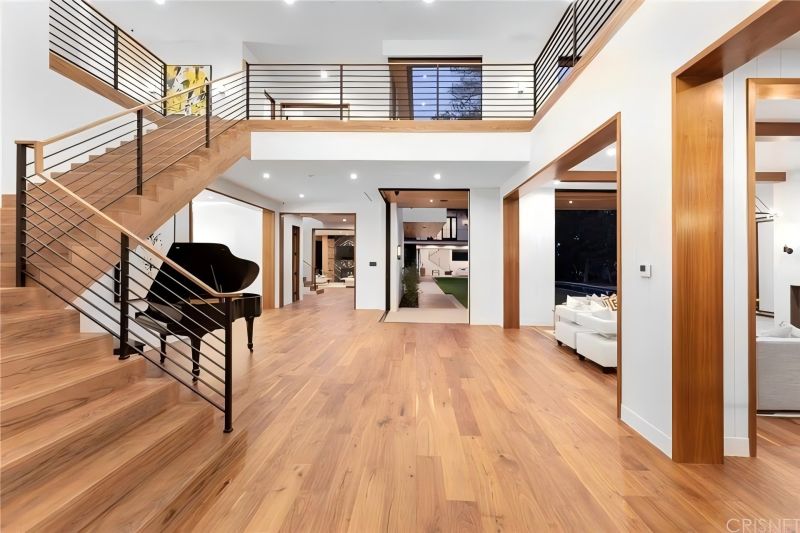
Modern Engineered Wood Flooring
Clean, minimalist designs with smooth surfaces and lighter tones, often featuring grey shades, are popular. Wide planks ranging from 5 to 12 inches contribute to a sleek, expansive appearance, while satin or matte finishes provide a subtle luster without overwhelming the space. Neutral color palettes, including whites, greys, light browns, and darker shades like charcoal or black, complement the uniform and simple grain patterns.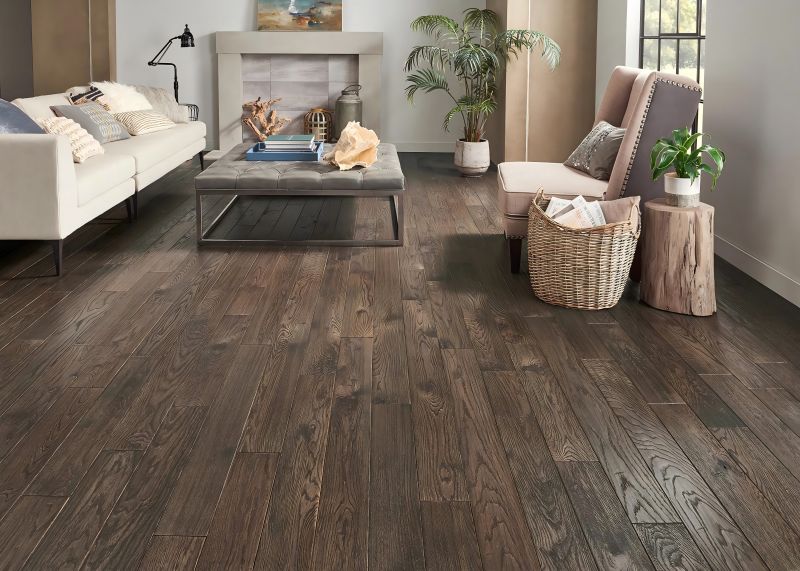
Traditional Engineered Wood Flooring
Classic designs with rich tones and pronounced wood grain evoke the timeless beauty of solid hardwood. Standard plank widths of 2 to 4 inches create a traditional hardwood floor layout, complemented by satin or semi-gloss finishes that balance durability with radiance. Warm color palettes, including honey, amber, and deep browns, pair well with visible and varied grain patterns in species like oak, walnut, or cherry.
Rustic Engineered Wood Flooring
A weathered, worn appearance with visible knots, imperfections, and a rough texture creates a natural, rugged look. Wider planks are often used to emphasize this rustic aesthetic, enhanced by hand-scraped, wire-brushed, or distressed finishes. The color palette includes natural, earthy tones like browns, greys, and faded hues that mimic the look of aged wood, paired with prominent, irregular grain patterns.
Industrial Engineered Wood Flooring
A raw, unfinished look combining rugged and refined elements is inspired by warehouse or loft aesthetics. Mixed-width or wider planks contribute to an eclectic, industrial vibe, while matte or low-sheen finishes, often with distressing or a reclaimed appearance, enhance the effect. The color palette features darker tones like charcoal, deep browns, and black, along with greys and weathered hues, paired with visible and exaggerated grain patterns that emphasize texture and imperfection.
What’s The Recommended Area of Engineered Wood Flooring?
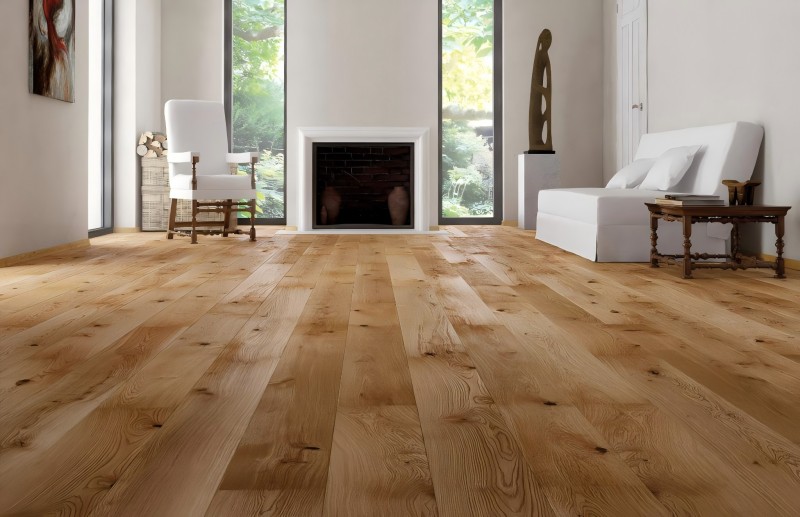
Living Rooms & Bedrooms
Why: Because of its warm, natural appearance, and comfortable feel underfoot, engineered wood flooring is a fantastic option for living areas and bedrooms.
Benefits: Adds a touch of elegance, enhances the coziness of the space, and complements a wide range of interior styles.
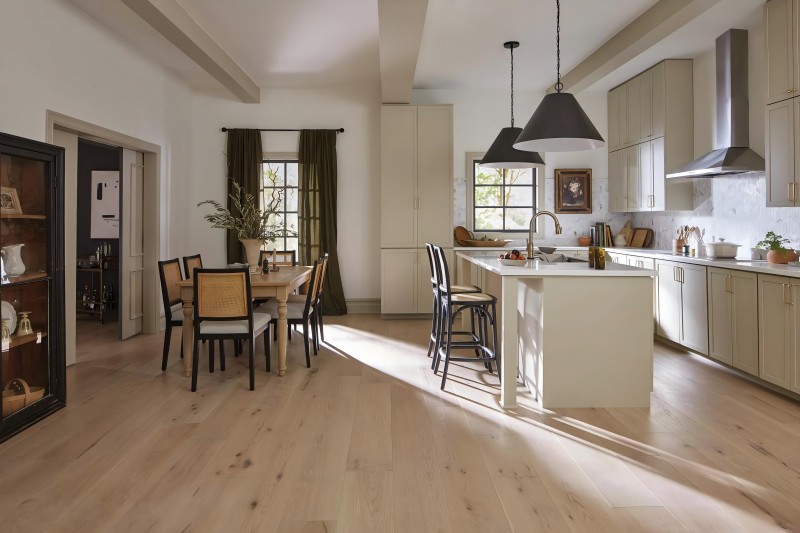
Kitchens
Why: Engineered wood is more stable than solid wood, making it suitable for kitchens where humidity and temperature changes occur.
Benefits: Provides a warm, inviting look that pairs well with both modern and traditional kitchen designs, while being more moisture-resistant than solid hardwood.
Basements
Why: Because of its layered nature, engineered wood is better suited for below-grade installations like basements since it is more resistant to damp and humidity.
Benefits: Adds a sophisticated, finished look to basements while being less prone to warping or cupping compared to solid wood.
Stairs
Why: Engineered wood can be installed on stairs, providing continuity between floors and enhancing the overall aesthetic.
Benefits: Durable and stylish, it can handle the wear of daily use while adding visual appeal to staircases.
Offices
Why: Engineered wood flooring adds a professional, polished appearance to home or corporate offices.
Benefits: Its easy maintenance and durability make it practical for spaces where office chairs and foot traffic are frequent.
Areas to Avoid
Bathrooms & Wet Areas: Engineered wood flooring is generally not recommended for bathrooms, laundry rooms, or other areas with high moisture exposure, as excessive water can damage the flooring over time.
What’s The Install Method of Engineered Wood Flooring?
Glue Down Installation
Engineered wood planks are adhered directly to the subfloor with a trowel-applied adhesive, requiring careful alignment and pressing of each plank for a secure bond.
Recommended For:
- Concrete subfloors, especially in basements or ground-level installations.
- Areas where a strong, permanent installation is desired.
- Larger areas where stability and sound absorption are important.
Nail Down Installation
Engineered wood planks are secured to a wooden subfloor by nailing or stapling through the tongue at a 45-degree angle using a pneumatic nail gun or stapler.
Recommended For:
- Plywood or wooden subfloors where a secure attachment is desired.
- Traditional or solid construction settings where a firm connection to the subfloor is preferred.
Click Lock Installation
Engineered wood planks with a locking mechanism snap together by aligning the tongues and grooves, creating a “floating floor” that requires no glue or nails for installation.
Recommended For:
- Areas with stable subfloors like plywood, concrete, or existing flooring.
- Temporary or semi-permanent installations where ease of removal is desired.
The Comparisons of 3 Install Method
| Feature | Glue Down Installation | Nail Down Installation | Click Lock Installation |
| Method | Adhesive is used to secure planks to the subfloor | Planks are nailed or stapled to the subfloor | Planks snap together without glue or nails |
| Subfloor Compatibility | Concrete or wood | Wood subfloors | Most subfloors, including concrete and wood |
| Installation Time | Moderate | Slower, more labor-intensive | Fastest |
| Skill Level Required | Moderate | High | Low |
| Stability | Highly stable | Very stable | Less stable, “floating” floor |
| Ease of Repair | More difficult to replace individual planks | More difficult to replace individual planks | Easier to replace individual planks |
What’s Cost Considerations for Engineered Wood Flooring?
First, calculate the cost of a new engineered wood floor by measuring the area of the space. Add 15 percent for cuts and waste, then multiply by the boards’ square-foot price.
Material Costs
Low-End: $3 to $5 per square foot
- Typically features a thinner veneer layer and fewer options for finishes and wood species.
- Suitable for budget-conscious projects or areas with lower foot traffic.
Mid-Range: $5 to $10 per square foot
- Offers a range of wood species, finishes, and a thicker veneer, providing a fair compromise between quality and cost.
- Ideal for most residential applications, providing durability and aesthetic appeal.
High-End: $10 to $15+ per square foot
- Premium engineered wood flooring with thicker veneer layers, exotic wood species, and high-quality finishes.
- Perfect for high-traffic areas, luxurious projects, or circumstances where long-term toughness is essential.
Installation Costs
- DIY Installation (Click-Lock): $1 to $2 per square foot
- Costs include underlayment and tools, but labor is free if you do it yourself.
- Professional Installation (Glue Down or Nail Down): $3 to $8 per square foot
- The geography, subfloor preparation, and installation intricacy all affect cost.
- A tight and durable fit is guaranteed by professional installation, particularly for glue-down or nail-down techniques.
Additional Costs
Underlayment: $0.50 to $2 per square foot
- Required for floating floors to provide cushioning, soundproofing, and moisture protection.
Subfloor Preparation: $1 to $3 per square foot
- May include leveling, moisture barriers, or removal of existing flooring.
Cost per linear foot for trim and molding: $1 to $3
- Includes transition pieces, baseboards, and other finishing details.
Stairs: $40 to $100 per step
- Custom fitting and finishing for stairs can add to the overall cost.
Total Cost Estimate
- Low-End: $4 to $7 per square foot (materials + DIY installation)
- Mid-Range: $8 to $15 per square foot (materials + professional installation)
- High-End: $15 to $25+ per square foot (materials + professional installation + additional features)
Conclusion
When buying engineered wood flooring, consider material quality, installation method, and cost. Choose a reliable engineered wood manufacturer to ensure durability and aesthetic appeal. Opt for professional installation for long-lasting results. Engineered wood offers a versatile, stylish solution for various spaces, combining beauty with practicality.